

To start a Shopify business, pick what you’ll sell, build your store on Shopify, add your products, and set up payment and shipping before you launch. The platform comes with built-in tools for design, inventory, and checkout. You don’t have to hire developers or stress about website hosting.
Starting a Shopify business gives you a way to sell online without needing a bunch of technical skills or a huge budget. Shopify handles everything, from building your website to processing payments and shipping orders. You can launch a full online store in just a few days, even if you’ve never run a business before.
This guide takes you through every step of building your Shopify store from scratch. You’ll figure out how to choose products, set up your account, design your storefront, and start making sales. Whether this is your side project or you’re all in, the process stays pretty straightforward if you follow the right steps.
Key Takeaways
- You can launch a full online store with Shopify, no tech background required, by following a simple setup process.
- Success means planning carefully—choose your products, understand your target customers, and handle legal stuff.
- Growing your store means tweaking your design, using helpful apps, and marketing your products to more people.
Laying the Groundwork: Research, Niche, and Business Planning
If you want to succeed on Shopify, you’ve got to know who you’re selling to, what market you’ll serve, and why customers should pick you over everyone else. These three things become the foundation for every other business decision you’ll make.
Check out our Amazon Marketing Cloud Agency here
Defining Your Target Audience and Buyer Persona
Your target audience is the group of people most likely to buy from you. Start by figuring out basics like age, income, location, and gender. Then go deeper—what do they care about, what annoys them, and how do they shop?
A buyer persona is basically a detailed profile of your ideal customer. Give them a name. List their goals, problems, shopping habits, and which platforms they like. Maybe it’s “Sarah, 32, works remotely, shops on mobile, cares about sustainability, and looks for eco-friendly stuff on Google Shopping.”
You can build these personas with surveys, social media analysis, and checking out competitors. Read reviews of similar products to see what people like and what gets on their nerves. Check search trends to see what words people use when they’re hunting for products like yours.
Most businesses do well with 2-3 personas. That way, you can tailor your marketing, product descriptions, and even your store design to each group.
Learn about AI Ad Creative: How to Scale Creative Testing for Ecommerce
Selecting a Profitable Niche Market
A niche market is a smaller slice of a bigger market with specific needs. Instead of selling random fitness gear, maybe you focus on yoga mats for beginners or resistance bands for seniors.
Look for niches that mix passion with profit. Search Google Shopping and other marketplaces to check if people actually want these products. Check keyword search volumes to make sure there’s real demand.
Watch the competition. Too many sellers make it hard to stand out, but if there’s almost nobody selling, maybe the market’s just not there. The sweet spot? Steady demand with room for a new brand that brings something fresh.
Think about margins and pricing power. Specialty products can usually command higher prices than generic stuff. Don’t forget about shipping costs, especially if your items are big or fragile.
Establishing a Unique Selling Proposition
Your unique selling proposition tells people why they should buy from you, not someone else. It’s not just about being different—it’s about being different in a way that matters to your audience.
Start by listing what you offer: maybe it’s quality, fast shipping, friendly support, exclusive designs, or expertise. Figure out which of those actually solve your buyer’s biggest headaches.
A strong unique selling proposition should be:
- Specific – “Free returns within 60 days” beats “great customer service.”
- Relevant – It should address what your audience really cares about.
- Provable – Back it up with guarantees, certifications, or reviews.
- Visible – Put it front and center on your homepage and product pages.
Check your competitors’ sites. If everyone says the same thing, it’s not unique. Anyone landing on your store should “get it” within seconds.
Legal and Administrative Preparation

Setting up your business legally protects you from personal liability and keeps your taxes straight. You’ll need to choose a business structure, pick a name that fits your brand, and set up your finances before you launch.
Registering Your Business Structure: LLC, Sole Proprietorship, and More
Your business structure decides how you pay taxes and whether your personal assets stay protected if things go sideways.
A sole proprietorship is the simplest. You don’t have to file formation documents, and you report business income on your own tax return. This works if you’re just testing an idea and the risk is low.
An LLC keeps your personal stuff safe from business debts. If someone sues your business, they can’t take your house or savings. Most Shopify sellers go for an LLC—liability protection plus simple taxes.
Register your LLC through your state’s Secretary of State. Fees run from $50 to $300 depending on where you live. You’ll need a registered agent in your state to get legal documents.
Corporations get more complicated and usually aren’t necessary unless you want big investors or plan to go public.
Store Name Selection and Branding Considerations
Your store name needs to be legally available and work as a brand on different platforms.
First, check your state’s business registry to make sure the name’s not taken. Then, see if the domain and social handles are up for grabs. If customers can’t find you online, you’re sunk.
If you want a name that’s not your legal business name, file a DBA (Doing Business As). That lets you operate under a brand name while your legal entity stays separate.
If your name or logo is unique, consider trademarking it. File with the US Patent and Trademark Office to protect your brand. Other countries like CA, AU, and GB have similar offices.
Setting Up Bank Accounts and Tax Settings
Open a dedicated business bank account to keep your business and personal money separate. Most banks ask for an EIN (Employer Identification Number).
You can grab an EIN for free from the IRS. Even sole proprietors should get one—it’s better than using your Social Security number for business stuff.
Set up your tax settings in Shopify based on where you sell. In the US, you need to collect sales tax if you pass $100,000 in annual sales or 200 transactions in most states. In CA, the trigger is $500,000.
Each state has its own rules. Register for a sales tax permit in states where you have economic nexus. Shopify Tax can handle the calculations and collections for you.
If you hire employees, set up income and payroll tax accounts. Keep detailed records of every transaction—it’ll save you headaches at tax time.
Setting Up Your Shopify Account
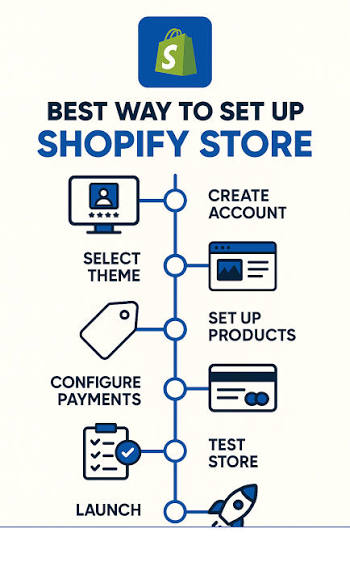
Getting your Shopify account ready is the first hands-on step to launching your store. Sign up for a free trial and get to know the main tools that run your shop.
Starting a Free Trial and Choosing a Shopify Plan
Shopify gives you a free trial so you can build your store before paying. Sign up on their website with your email. During the trial, you can add products, tweak your design, and test things out.
When your trial’s up, pick a paid plan. Shopify Basic is perfect for new stores—covers selling online, payments, and inventory. It’s affordable and has all the essentials.
Advanced Shopify and higher tiers give you more—think detailed reports and lower fees. Most beginners should stick with Basic. You can always upgrade later if you need more tools.
Navigating the Shopify Dashboard and Store Builder
The Shopify dashboard is your main hub. Here, you manage products, check orders, track sales, and tweak store settings. The left sidebar has all the main sections: products, orders, customers, analytics.
To build your store, use Shopify’s drag-and-drop editor. No coding needed. Add sections, move stuff, and change colors with a few clicks.
You get pre-made themes to customize. Open the theme editor for the drag-and-drop interface. Preview changes before you publish. The dashboard also shows a checklist of tasks to finish before launch, so you can keep track of where you are.
Designing Your Storefront
Your storefront design shapes how people see your brand and shop your products. The right theme and layout make shopping easy and help build trust.
Choosing and Customizing a Shopify Theme
The Shopify Theme Store has both free and paid themes for different industries. Free themes work great for new shops, while premium themes (usually $150–$350) offer more features.
Pick a theme that fits your product type. Fashion stores need strong image galleries, while tech shops need detailed specs. Make sure your theme is mobile-friendly—most shoppers are on their phones.
Key customization options:
- Colors and fonts – Stick to your brand and don’t go wild with fonts (three max).
- Logo placement – Put your logo in the header and update your favicon.
- Navigation menus – Make it easy to find main product categories.
- Homepage layout – Show off products but also tell your brand’s story.
Most themes let you drag and drop to adjust layouts. Test a few arrangements to see what helps shoppers find things fastest.
Optimizing Store Layout and User Experience

Guide customers from browsing to checkout without making them think too hard. Start with a clean homepage that shows what you sell right away.
Add a search bar if you’ve got more than 20 products. Put your main categories in the top navigation. Use sidebars or footers for policies and contact info.
Essential features:
- High-contrast “Add to Cart” and checkout buttons
- Product filters for size, color, and price
- Quick view for product details without leaving the page
- Trust signals like security badges at checkout
Keep your pages loading fast—compress images and don’t overload with apps. Even a one-second delay can drop conversions by 7%. Check your store on both desktop and mobile so you don’t miss any layout issues.
Adding and Managing Products
Your product pages are the heart of your Shopify store, so you want to get them right from day one. Each listing needs clear descriptions, good images, and solid inventory tracking to keep things running smoothly.
Creating Product Listings and Descriptions
Add products through your Shopify admin by clicking Products, then Add Product. Fill in the title with your product name and write a description that tells people exactly what they’re getting.
Your product descriptions should cover key details like size, materials, features, and benefits. Keep it simple and straight to the point. Answer the questions customers always ask.
Stick to facts, not just marketing fluff. Tell shoppers what your product does, how it works, and why it solves their problem. Break up long text into short paragraphs or bullet points so it’s easy to scan.
Uploading High-Quality Product Images and Photos
Your product photos can make or break a sale. Upload at least 3–5 images for each product, showing different angles and details.
Use clear, well-lit photos on a clean background. Show the front, back, sides, and close-ups of key features. If you can, add lifestyle shots of the product in use.
Shopify accepts JPG, PNG, and GIF. Aim for images at least 2048 x 2048 pixels—bigger files let customers zoom for details.
Setting SKU, Variants, and Inventory Management
A SKU (Stock Keeping Unit) is just a unique code you make up for each product so you can track it. You can use numbers, letters, or a mix—whatever works for you. For example, “TSHIRT-BLU-L” might be a large blue t-shirt.
Product variants let you offer options like size, color, or material without creating separate listings for every choice. Add variants in the product editor under the Variants section.
You can give each variant its own SKU, price, and inventory count.
When you turn on inventory tracking for a product, Shopify keeps tabs on your stock automatically. You might update stock counts by hand, or use apps that connect to systems with guided picking and cycle counts.
Some advanced warehouses use RFID receiving for faster scanning, but honestly, most small shops just update quantities by hand after a stock count.
Configuring Payments, Shipping, and Tax
Before you can accept orders, your store needs three things: a way for customers to pay, shipping rates that calculate correctly at checkout, and tax collection that keeps you compliant.
Each system connects to your checkout and directly affects your profit margins.
Enabling Payment Gateways and Shopify Payments
Shopify Payments is hands-down the fastest way to accept credit cards and digital wallets. It plugs right into your admin—no third-party accounts or merchant setup needed.
You’ll manage all transactions, payouts, and chargebacks from one dashboard, so you don’t have to log in everywhere.
The main perk is pricing. Shopify Payments skips the extra transaction fees that other providers tack on. If you go with PayPal or Stripe, Shopify charges an extra 0.5% to 2% on top of what the gateway already takes.
To turn on Shopify Payments, navigate to Settings > Payments in your admin. Fill in your business details, bank info, and verify your identity.
Once you’re set up, Shopify Payments supports accelerated checkouts like Shop Pay, Apple Pay, and Google Pay automatically.
If Shopify Payments isn’t available in your country, pick from over 100 supported gateways. Compare their processing rates, setup fees, and payout schedules before you decide.
Most stores offer at least two payment methods to cut down on cart abandonment. Why not give customers a choice?
Optimizing Shipping Strategy, Rates, and Zones
Shipping zones decide which areas you serve and what rates customers see. Start with your main market, then add international zones if you expand.
Each zone includes specific countries or regions with their own rate structure.
You’ve got a few ways to set shipping rates: free shipping, flat rates, calculated rates, or local pickup. Free shipping works best if you build the cost into your prices.
Flat rates keep checkout simple but sometimes miss the mark on cost. Calculated rates connect to carrier APIs to show real-time prices based on location and order weight.
Head to Settings > Shipping and delivery to set up your zones. Add package sizes and weights to get more accurate rates.
If you use Shopify Shipping, you can buy discounted labels right from your admin and print them for USPS, UPS, or DHL.
If you’ve got a physical location, think about offering local pickup. Customers can skip shipping fees, and it shows up at checkout.
Setting Up Tax Collection and Transaction Fees
Tax collection starts with figuring out where you have nexus—a legal reason to collect sales tax. Your home state always counts as nexus.
If you store inventory in other states or hit certain sales numbers, you might have nexus there too.
Go to Settings > Taxes and duties and turn on automatic tax collection. Shopify calculates rates based on your nexus locations and product categories.
Shopify updates tax rates often, but double-check to make sure they match your local rules.
If you sell tax-exempt products like groceries or clothing, pick the right product category for each listing. Shopify Tax uses these to apply exemptions automatically.
For customers with tax-exempt status, update their profile so taxes don’t get charged on their orders.
Register with your state’s tax authority before you collect anything. Depending on your volume, you’ll file returns monthly, quarterly, or yearly.
Keep transaction records handy in your Shopify admin for reporting.
App Integrations and Essential Tools
The right apps can really level up your Shopify store. Start with basics like email marketing and customer reviews.
As you grow, add analytics tools to see what’s actually working.
Must-Have Shopify Apps for Sales and Marketing
You want to build trust and capture customer info right away. Judge.me gives you unlimited product reviews—even with photos and videos—on its free plan.
The app sends review requests after fulfillment and shares ratings with Google search, so your products stand out.
For email marketing, Klaviyo is still the go-to for growing stores. It segments customers by purchase behavior and sends automated campaigns for abandoned carts, welcome series, and follow-ups.
If you’re just starting, try Shopify Email to keep costs down while you learn.
Add sales channels smartly. The Shopify App Store has integrations for TikTok, Facebook, Instagram, and Pinterest that sync your products automatically.
These let customers buy right from social media.
Enable Shop Pay at checkout. This one-click payment saves customer info and speeds up future purchases, cutting cart abandonment by as much as 18%.
Enhancing Analytics and Customer Feedback
Shopify Analytics gives you basic sales data, but for deeper tracking, connect Google Analytics 4 in your first week.
Apps like Analyzely handle event tracking for product views, cart adds, and purchases—no code needed.
Track your ad performance with pixel management apps. These install Facebook Pixel, TikTok Pixel, and Google tags with server-side tracking to beat ad blockers and iOS privacy rules.
Without proper tracking, you might think ads aren’t working when they actually are.
Watch which products end up on wishlists the most. Wishlist apps show you what customers want but aren’t buying yet—perfect for targeted promos.
Send discount codes to wishlist users to nudge them into buying.
Review your app stack every month. Delete anything you’re not using, since every app adds code that can slow down your site.
Page speed really matters for conversion rates and search rankings.
Launching and Growing Your Shopify Store
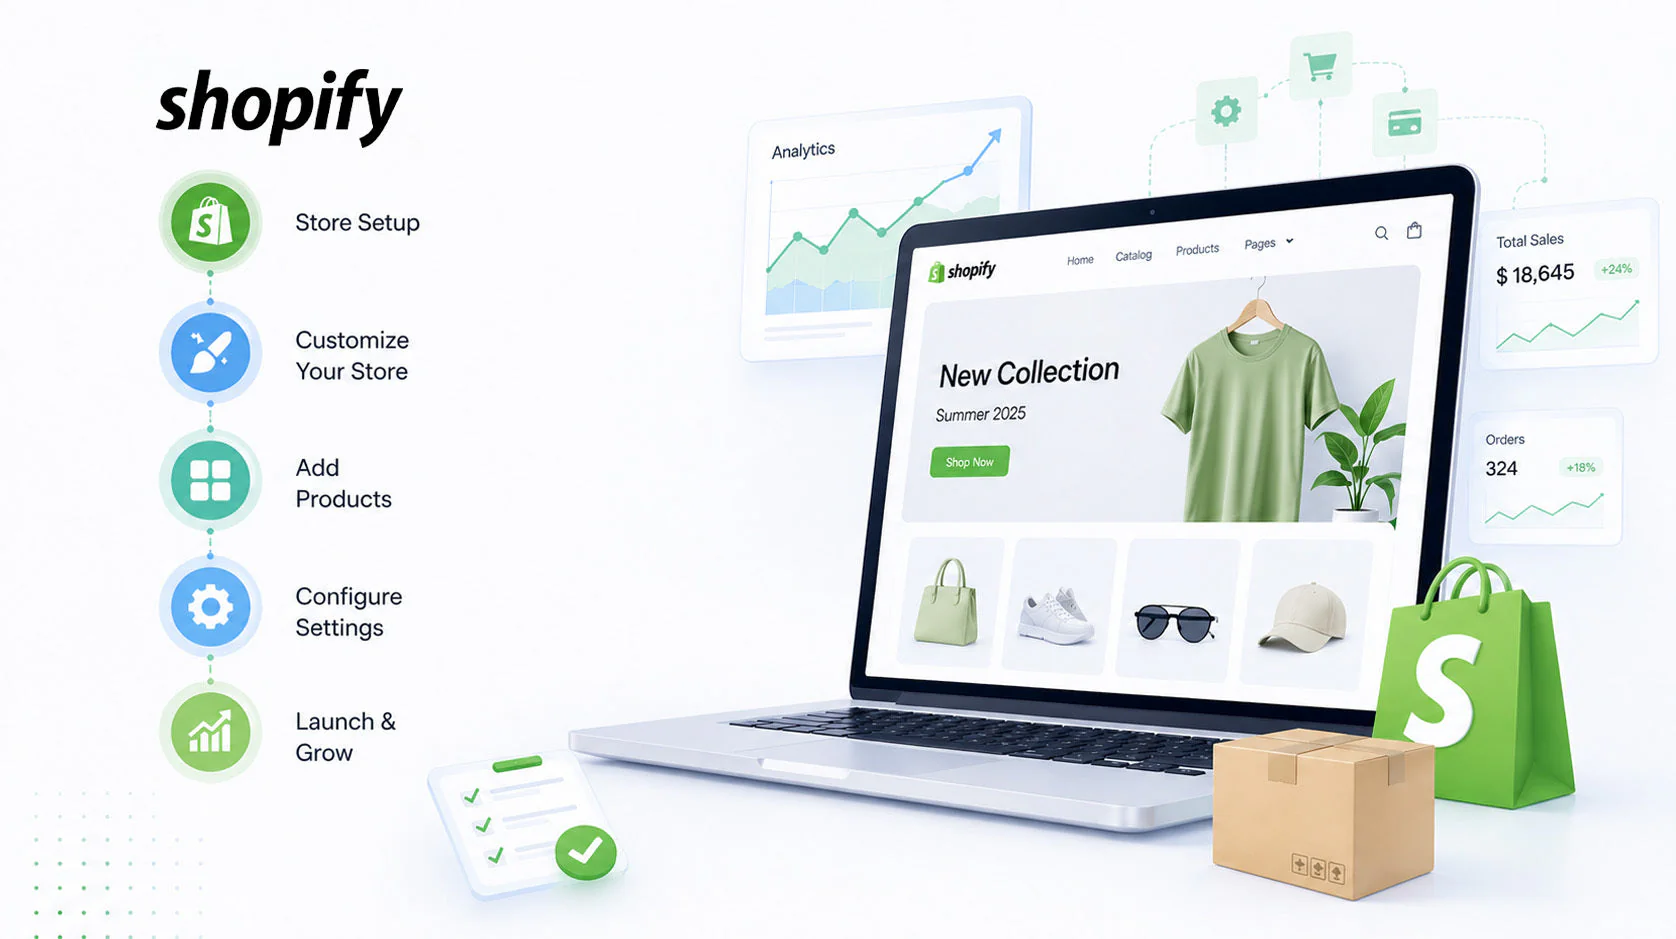
Getting your store live takes prep and testing. Growth comes from smart marketing and keeping customers coming back.
Validate your setup before launch, then build momentum with targeted strategies and steady improvements.
Launch Checklist and Making Your Store Live
Before you go live, work through a launch checklist to catch issues early. Place a test order to make sure payments work and customers get confirmation emails.
Look over your product pages—do images load fast, descriptions make sense, and prices show up right?
Check shipping settings to see if rates calculate correctly for different locations. Set up your domain so people can find your store.
Add legal pages like privacy policy, terms, and refund policy to build trust and cover your bases.
Review your store on mobile. Most shoppers browse on their phones, so make sure navigation is smooth and buttons are easy to tap.
Once everything looks good, remove password protection to launch your store. Maybe start with a soft launch to a small group before going big.
check out our Amazon UK & Europe Agency here
First Sale Strategies and Scaling Up
Your first sale? It’ll probably come from someone you know. Reach out to friends and family for those initial orders and honest feedback.
Early customers help you iron out the kinks.
Offer free shipping on first orders to lower the barrier for new shoppers. Set a minimum order value that covers your costs but still feels like a deal.
Create urgency with limited-time promos or exclusive launch discounts.
As orders pick up, track which products sell best and adjust your inventory. If you’re dropshipping, stay in touch with suppliers for smooth fulfillment.
Watch your profit margins and reinvest earnings into inventory and marketing that actually works.
Scale up slowly—test new marketing channels one at a time. Measure results before you spend more.
Utilizing Social Media and Email Marketing Partnerships
Social media marketing puts you in front of potential customers where they already hang out. Focus on the platforms your audience actually uses, not everywhere.
Post product photos, behind-the-scenes peeks, and customer testimonials often.
Start building your email list right away—add a signup form to your store. Offer a discount or freebie in exchange for emails.
Send welcome emails to new subscribers, and keep existing customers in the loop about new products or sales.
Email usually brings higher returns than other channels because you actually own your list. Send 2-4 emails a month to stay visible without being annoying.
Form partnerships with other businesses or influencers in your niche. You might cross-promote, bundle products, or set up affiliate deals where partners earn a cut of sales they refer.
Continuous Optimization and Customer Retention
Optimization never really ends. Check your analytics weekly to spot pages with high bounce rates or where customers drop off.
Make small tweaks based on real data, not just gut feelings.
Try different product photos or descriptions and see what works better. Add reviews to product pages for that extra social proof.
Speed up your site by compressing images and ditching unnecessary apps.
Keeping customers is way cheaper than finding new ones. Send personalized thank-you emails after purchases and ask for feedback.
Set up a loyalty program to reward repeat buyers with discounts or early access to new stuff.
Follow up with customers who haven’t bought in a while—special offers can bring them back. Ask happy customers for reviews to build credibility.
Handle complaints quickly and professionally. Sometimes you can turn a negative into a positive if you respond well.
Frequently Asked Questions
Starting a Shopify business brings up lots of real-world questions about costs, setup, and whether the platform fits your needs.
Here are answers to the most common things new store owners wonder about.
How much does it cost to launch an online store on Shopify, including apps and marketing?
The Basic Shopify plan runs $39 a month and covers everything you need to start selling—hosting, SSL, and core e-commerce features.
You’ll need a domain name, usually $10-15 a year. Most new stores add 2-5 apps in the first few months, ranging from free to about $50 a month total, depending on what you pick.
Marketing costs are all over the place. You can start with free options like social media and SEO.
If you try paid ads, most beginners start with $100-300 a month to test things out.
Bare minimum, expect $40-50 a month if you stick to the basics. With a few apps and some marketing, $150-400 a month is a realistic starting point.
Can I start an online store with little to no budget, and what are the minimum essentials?
You can start with just the Shopify subscription during the free trial. That gives you time to build before you pay.
All you really need is a Shopify plan and products to sell. Use the free themes and built-in features—no need to spring for extra apps or fancy designs right away.
If you’re on a tight budget, focus on dropshipping or print-on-demand so you don’t have to buy inventory.
Promote your store for free through social media, content, and word of mouth.
The myshopify.com domain is free, so you can wait to buy a custom domain until you make some sales. Plenty of successful stores started this way and upgraded later.
What are the exact steps to set up a Shopify store from scratch for a complete beginner?
Head to shopify.com and click the start free trial button. Enter your email and set a secure password.
Answer the setup questions or skip them if you want. Choose your store name, which creates your myshopify.com URL (you can change it later).
Pick your country and default currency in store settings. Choose a free theme and customize it with your brand colors and logo.
Add your products—titles, descriptions, prices, and photos. Set up payment providers so you can accept credit cards and other methods.
Configure shipping rates and zones based on where you’ll ship. Add pages like About Us, Contact, and your policies for returns and privacy.
Install any apps you need for features Shopify doesn’t cover out of the box. Place a test order to make sure checkout works.
When you’re ready, remove password protection in the online store settings. Start promoting your store through your chosen channels.
Do I need to form an LLC or register a business before I start selling online?
You can sell on Shopify without forming an LLC or registering a business entity. Shopify lets you operate as a sole proprietor under your own name at first.
You do need to follow tax laws where you live—collect sales tax if required and report your income at tax time.
Many store owners start as sole proprietors and form an LLC later, once they see steady revenue. An LLC gives you liability protection and sometimes tax perks, but it’s not a must-have to begin.
Check your local rules for business licenses or permits. Some places require basic business registration even for online sellers.
Is Shopify a good platform for beginners, and what are the main pros and cons?
Shopify really aims at folks who don’t have any technical background. The dashboard is simple and pretty intuitive, so you can build a store without touching a line of code.
Since the whole thing runs in the cloud, you won’t have to mess with servers or worry about software updates. Hosting and security? Shopify takes care of all that behind the scenes.
Some big perks: uptime is solid, payment processing feels secure, and there’s a huge app store if you want to add new features. You can pick from a bunch of professional themes, and they all work well on mobile—no need to pay a developer.
But there are a few drawbacks. You’ll pay monthly fees whether your store makes money or not. And unless you use Shopify Payments—which, annoyingly, isn’t available everywhere—they’ll tack on transaction fees.
Customizing your store has its limits, especially if you want something totally unique. Plus, you’re kind of at Shopify’s mercy; if they change something on the platform, your store changes too.
How do I start a dropshipping store on Shopify and choose reliable suppliers?
First, grab a dropshipping app like DSers, Spocket, or Modalyst from the Shopify App Store. These apps connect you directly with suppliers, so you can pull products into your store without much hassle.
Take some time to check out suppliers—look at their ratings and reviews. I’d definitely recommend ordering sample products yourself. It’s the only real way to see if the quality and shipping speed actually match what they promise.
Try to stick with suppliers closer to your target market. Shipping from the US or EU usually costs more, but honestly, the faster delivery is worth it for most customers.
Don’t go overboard with products at the start. Pick a small product selection—maybe 10 to 20 items. It’s just easier to manage, and you’ll get a better sense of what your customers are actually looking for.
Set your prices so you’re covering the product cost, shipping, transaction fees, and your profit margin. Most dropshippers I know shoot for a 30-50% profit margin after expenses.
Always be upfront about shipping times in your product descriptions and store policies. If you communicate clearly, you’ll save yourself a lot of headaches with complaints or refund requests later.